Kitchen Reno Part 1. Removing a Load Bearing Wall.
I’ve mentioned before that we refer to our house as Eichler-esque. Joseph Eichler built mid-century modern sub-divisions around the Bay Area starting in 1949. Our house is not an Eichler, but it has similar vibes and that is why we bought it.
However, I would also like to point out that our house and our neighbor’s houses have a lot of weird quirks. Some of it can be attributed to having several owners over the years who slowly changed things, and some are just weird. For example, everyone with this style of house in our neighborhood has (had) ROPE used as some sort of crown molding at the edge of the walls and ceiling. Like actual rope, that was nailed to the damn wall.
That brings us to this extremely poor execution of a kitchen “update” that was done at some point before we bought our house.
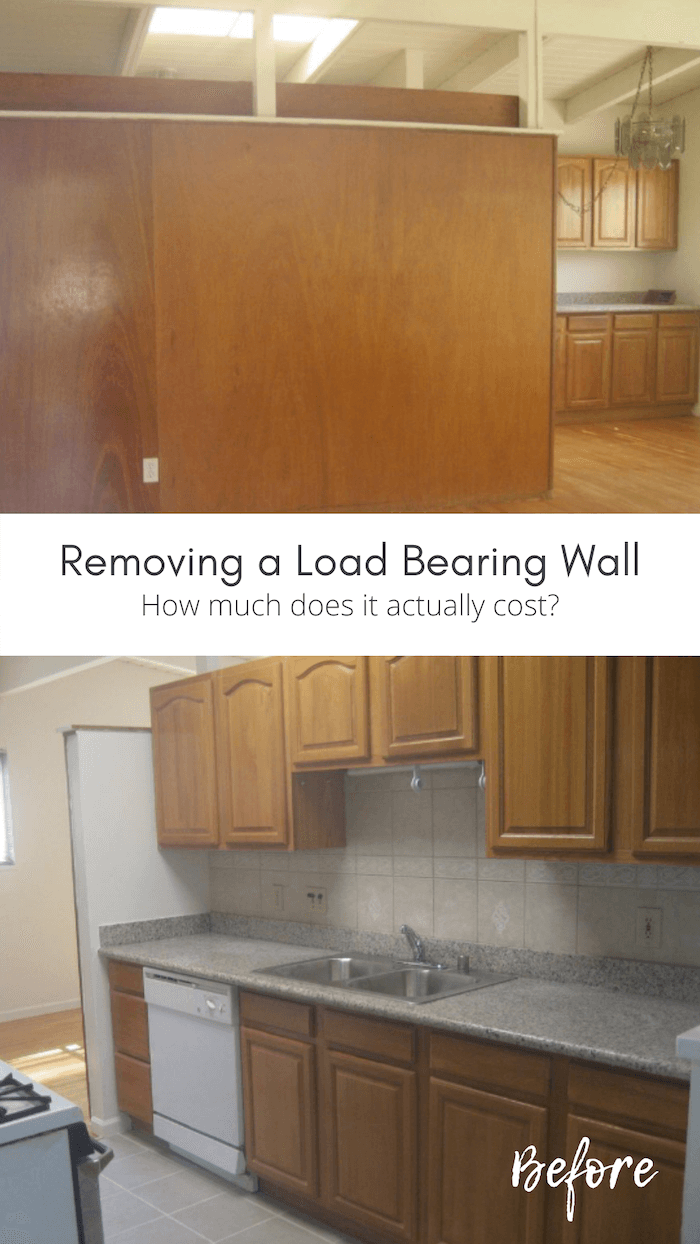
For your enjoyment, this is what the house looked like when walking in the front door (which is on the side of the house). That top layer of wood paneling above the white line is because they hung cabinets too high on the other side and they were sticking up so they covered it with paneling that was just slid in and not attached to anything at all. Swell.
These support posts are in all of the houses like ours, but most mid-century homes utilized this space above an island for open shelving to allow light into the kitchen. Instead, someone built this fake “half” wall with faux Philippine mahogany paneling. It was stained more kinda orange and was FULL of nail holes.
This is a very small house so we knew that we needed to open up the space a bit more and create something more like a great room. However, the main beam that carries the majority of the load was partially being supported by these posts in the kitchen.
This is not a DIY project (we live in earthquake country and I am not messing around with getting crushed by my roof) but since it is a challenge many homeowners face, I’ll break it down.
We reached out to 10 companies to get bids on the project because we had no idea how much it would really cost. The Bay Area is also much more expensive compared to similar work elsewhere in the US. Most of them replied, some said no due to workload, others scheduled visits and never showed up, and then about 4 actually came to look at the space. Prices ranged from $18K that was later revised to $27K and others would only do the work if we also hired them for the full kitchen remodel.
To remove the posts we needed to strengthen the footings in the crawl space and the supports in the walls that will need to carry the load. Super simple right? Here’s how it went down.
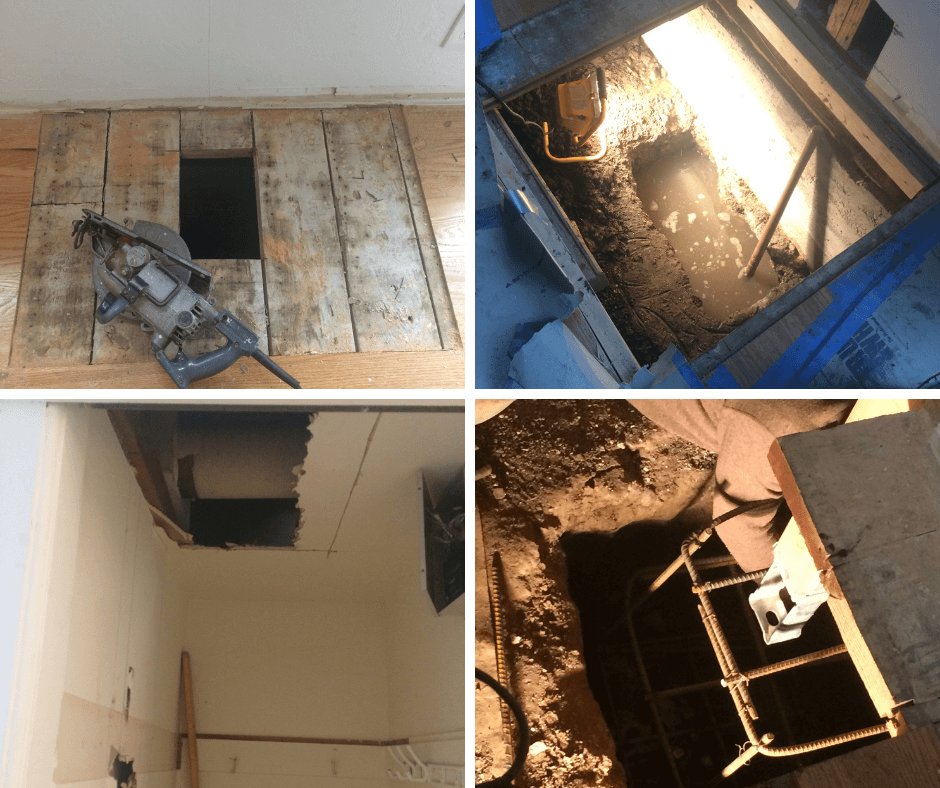
1st step, demolition! This involved cutting 2 large holes in the floor on either side of the beam, and also opening up the walls on both sides. We also discovered that we had a drainage issue (this was done during rainy season, otherwise we may not have known). Luckily this did not have to be fixed at this time, so we were able to plan for that cost and project down the road.
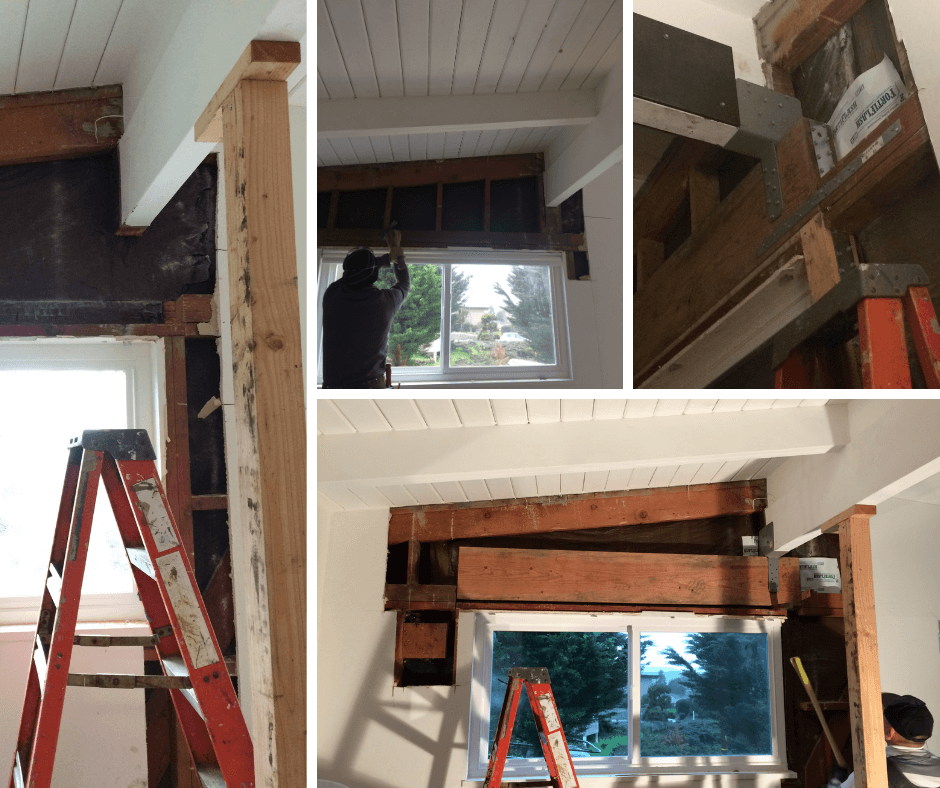
Replacing the header above the window
In the top middle picture, you can see that the header above the window was way too small to support the weight needed to remove the load-bearing wall in the kitchen. We had replaced this with a massive new header and brackets across the top and all the way down the right side of the window.
Hindsight 20/20 we should have added insulation in that wall while we had it open. We thought about it and figured it would be weird to just do part of it but we should have just done it while it was open.
We went a bit unconventional here but really love it. We chatted with our architect about options and decided to place 2 500 pound steel panels on either side of the existing central beam.
Then there was the very stressful installation which involved 8 very strong humans. They propped each panel up outside and brought them in through the dining room window. It was impressive communication to watch and needless to say I was happy when it was over and no one was crushed to death.
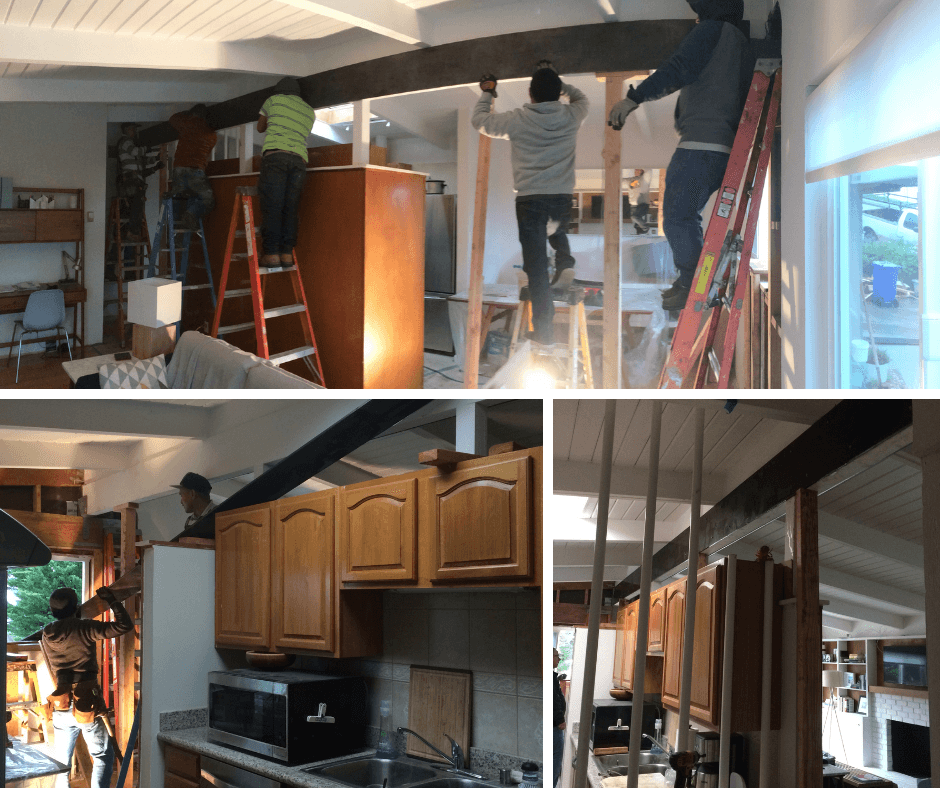
Beam Support Installation
Tada! Here’s the finished result. We still debate if we should paint the other beams black to contrast against the white. What do you think?
Total Cost: $21,929

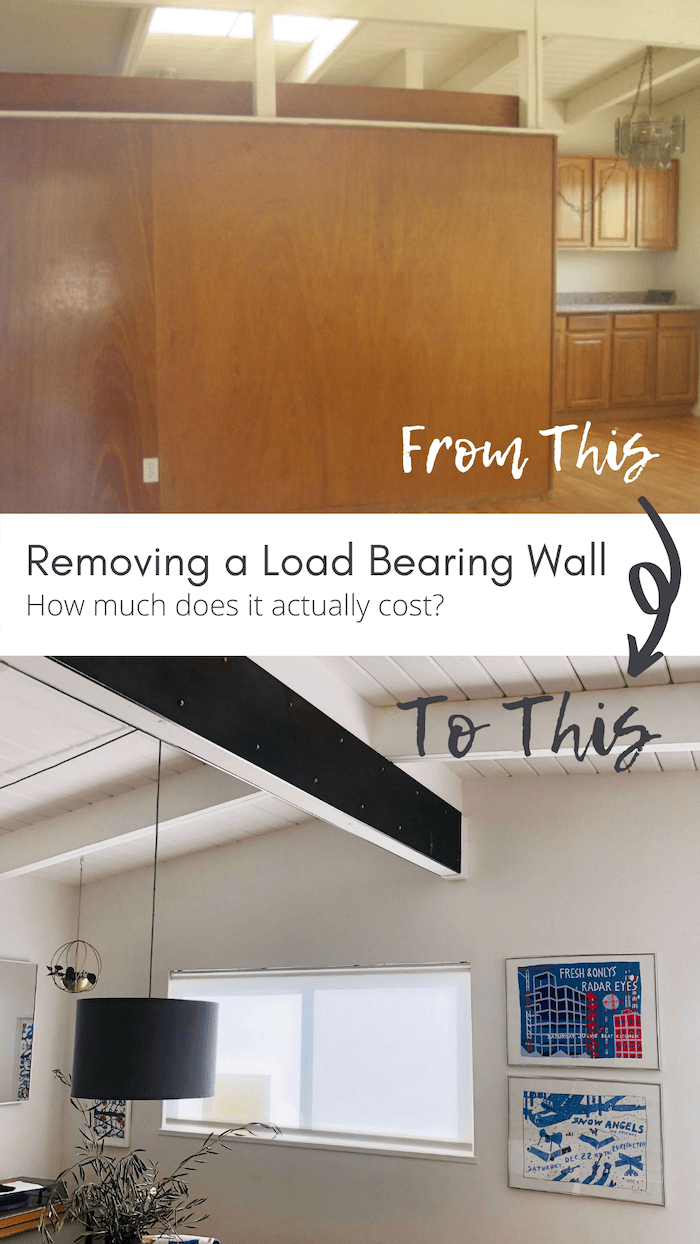
Here’s one angle of the before and after without spoiling the kitchen remodel.
Since cost transparency and how to budget for home projects is really important to me, there is much more to come here. Basically, we saved the downpayment and didn’t have a ton of wiggle room to embark on a massive project right away. We did the beam, then broke down the top part of the old island. Then we tackled the kitchen reno a few months later.
Yes, it took a while. But I prefer controlling the costs while still making progress instead of going into debt or waiting years to move onto a project that is something we have to look at every.single.day.
How we continued to plan and break up the full renovation into easy to tackle stages.